Wednesday, June 11, 2014

Front Flowerbed... again

Chad's mom is doing some spring cleaning. She has given us all kinds of awesome things, but the most exciting thing has been some large bricks! Which gave us the incentive to re-do the front flowrer bed... again! 

This is what it looked like last time we cleaned it out and put down pine straw.


Notice the sad little tree in the front yard. It has been the same exact size since we planted it (2 years ago). Does anybody know what it is or why it's not growing?!


We started by cleaning the beds out and putting the bricks down. We have always wanted a side walk, but that would cost more money than we are wanting to spend right now. For now, we just made a fake walkway right in front of the door.... you'll see.


We had so much grass growing over the beds, Chad just used the weedeater and cleared it all out. It saved time, we would have been there for hours pulling all of that out! 

Next we decided on black mulch. Home Depot was having a sell on mulch. 4- 2 cu ft for $10! We got 8 bags. Then we got 4 bags of red lava rocks for the walkway. 


Would you be surprised if I told you we had to go to Home Depot twice?

After we decided on what we were going to put in the beds, we had to clean it out really good and level the walkway. 


We had originally decided to use the 4 walking stones along with the lava rocks, but quickly decided against that. 

Here's the final product!!! 


We LOVE it!!! 

Have ya'll done any big outside projects lately?


Monday, June 9, 2014

Grout Paint Part 2

I have been super busy the last couple of weeks!!! I have been working on finishing the grout, patching walls, touching up paint, standing and repainting the stair rail, redoing the front flower beds (for the 3rd time since we moved in) and cleaning carpets. We are getting ready for Reeves birthday party which is less than a month away!!!

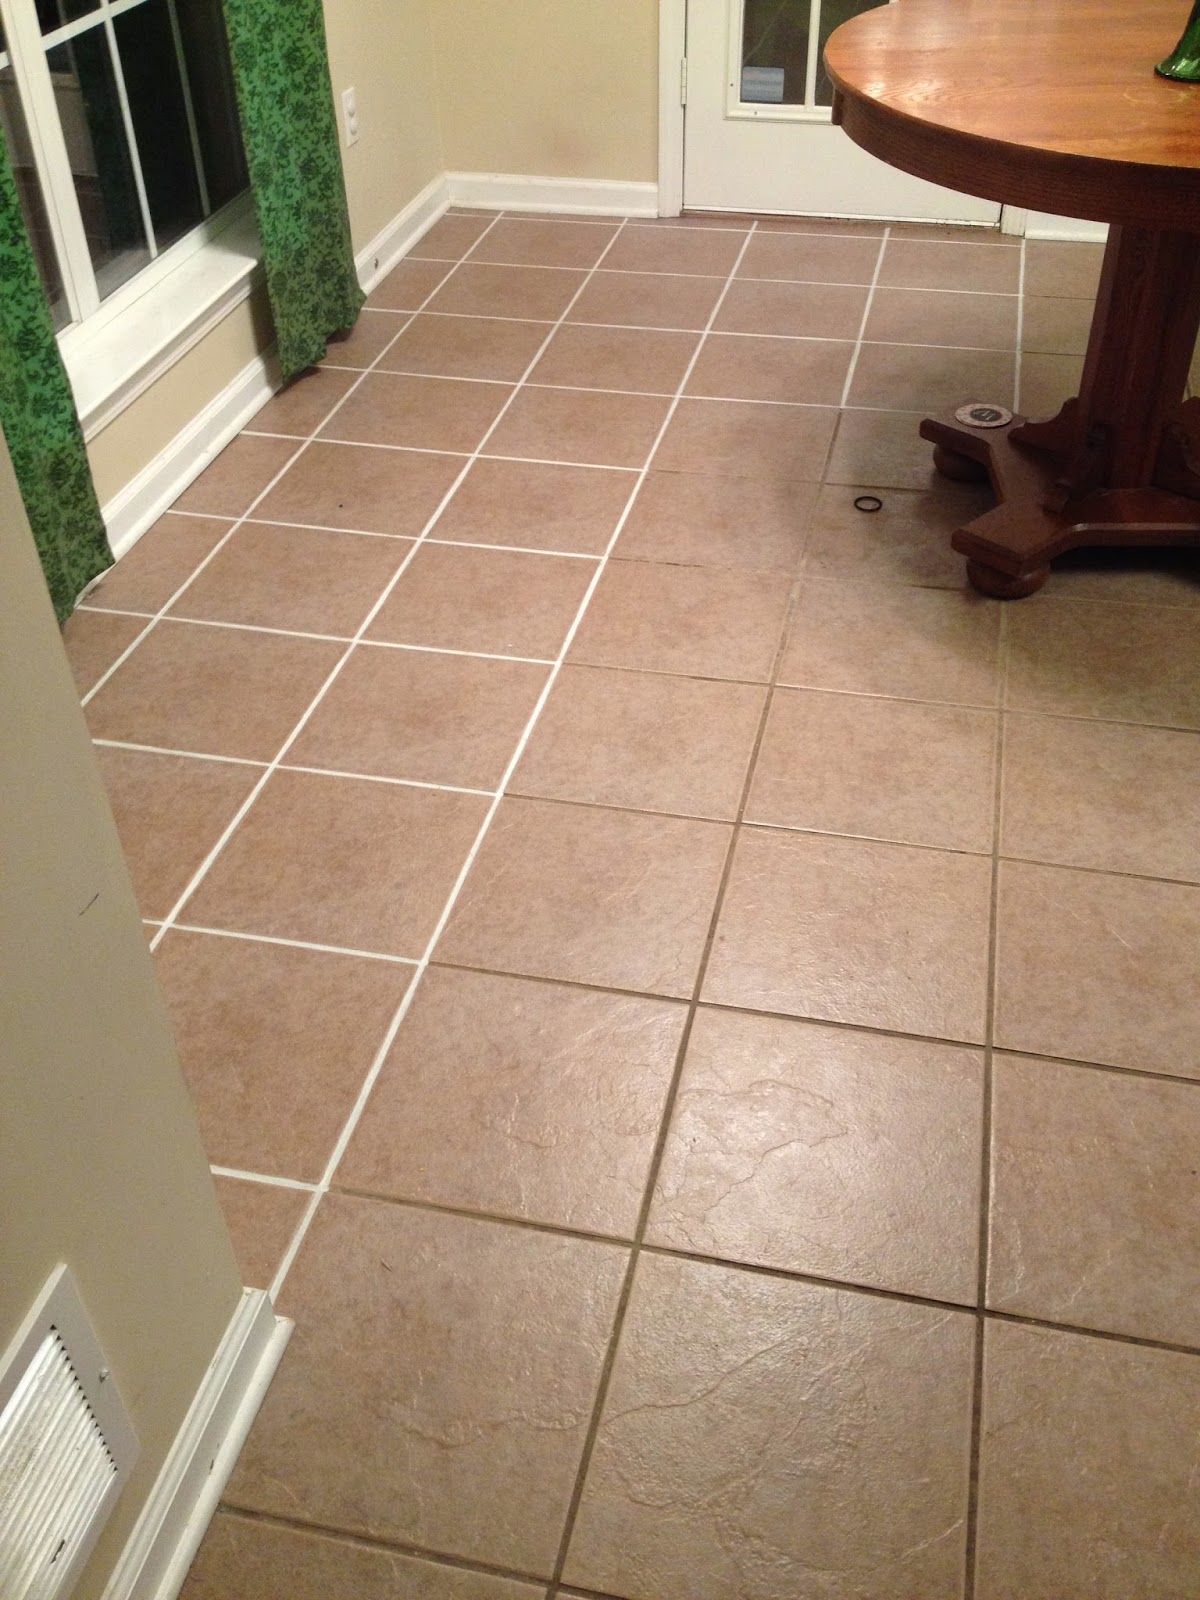
Here's where I left ya'll last time I blogged about the grout paint.

This is what the floors looked like before I paint them.


I spy and cute baby foot


Please try and ignore that cat box, oops.

Lets start where I started, in the hall. I started where I left off in the kitchen. I went in the hall until I came to the half bath. I have been worried about doing that room since I started the whole project. It actually wasn't as bad as I thought. But don't get me wrong, it wasn't easy. I had to get behind the toilet.


I couldn't be happier, too bad I cover it all up with a rug. haha.

I finished the hall....


Then I moved into the space in front of the master. 


I think it makes the floors look bigger... does that make sense? 

Then came the laundry room. I had to clean everything out...which was a job in its self. I also cleaned the floors really good since that's where Coal's box goes. I decided not to move the washer and dryer. If we ever sell this house, I'll fix it then. 


This was the very last ones I did!! I was so excited by this point!!


I'm so happy with how it turned out, but I have to say, IT WAS A JOB!!! 

Stay tuned, I'm going to clean the floors to get all the "wiped" paint off the floor.


Monday, May 26, 2014

Grout Paint (Part 1)

As I've said before (HERE) the grout in our house is NASTY! We looked into re-grouting our tile (because there is so much of in our house) but that would cost a small fortune! I tried cleaning it, that's a joke. I saw on pinterest that Home Depot carried a grout paint. It was only $12, score! I bought some a year-ish ago and did the grout in front of the front door. It was super easy but I'm super lazy and thats as far as I got! I've decided to do the kitchen, hall, half bath and laundry room. Maybe one day I'll do the master bathroom & Reeves' bathroom but for now I'm not going to be too ambitious!!

This is what I used.....


 Before pictures.....
Going into the kitchen from the dining room

Going into the kitchen from the living room


I started one night, and trust me... THIS IS A LLLLOOOONNNNGGGG process! It took me 2 hours just to do the parts in the pictures below....


After I finished those small parts I kept putting off doing the rest of the kitchen...I'm talking 3-4 months. Oops. 

I was tired of hearing Chad ask if I was ever going to finish the grout! Plus, we couldn't have Reeves' birthday party here with half the grout painted!! 

I would like to say... as I write this... THE KITCHEN IS DONE!! WOOHOO! It took about 4 hours but it was totally worth it!!!!

Here are some pictures.... the paint was still drying so the table and chairs were still moved around...


Ready for a tutorial???? 

First I vacuumed the floor. I didn't mop because I didn't want the floor or grout to be wet. I'm going to have to mop in a few days so I didn't want to do it twice. Get my drift?! 

I made a video, I'll try and post it in Part 2! 

For now, bare with my pictures!! :)

I used a small craft brush. The bottle says to use a small toothbrush, I tried that in the foyer in front of the front door and it took forever! I'm use to using the craft brush so it just seemed easier! 

Before.... Isn't the grout nasty??? 

I got quite a bit of paint on the brush and painted in one direction. Try not to go back and forth, you'll see brush strokes. I didn't worry about getting paint on the tile... I'll show you how to clean up later. I figured out I could paint 2 sides of the tile then clean up without the paint drying. The paint dries pretty quick!!


I used an old kitchen towel to clean up the tile! I went through 3 towels! I rinsed out each towel twice before getting a new one. I noticed the paint didn't "wash" out as easy after the second time. 


I just followed, with my finger, the line where the grout and tile met. Sometimes my towel would smudge some of the paint... I would just carefully fix it with my brush. 

Is every line of grout perfect? Absolutely not. There is no way I could get the paint perfect on every line of grout! When you're sitting on the floor staring at it, you can see imperfections! But, I thought about it like this... how often do people stare at your grout??? Even if they come in a know it looks different (um. clean?) they'll be standing. I decided it wasn't worth the trouble to make it perfect! 


I can't get over how amazing it looks...


After I finished the kitchen, I noticed most of the tiles looks like they have a "film" on them. I'm guessing I didn't clean as well as I thought when I was cleaning around the grout! Oops. 

I have to wait 72 hours before I can get the grout wet, so I'll mop then! 


In part 2, I'm going to work on the hall, half bath and laundry room. Since the grout I just painted is bright white, I'm going to redo the front foyer, I'll show you that too. I'm also going to do the clean up. Stay tuned!!!! 


Thursday, May 22, 2014

Photo Wall

When you come out of our laundry room, there is a big blank wall. It drives me crazy! I decided it was a perfect place for a photo wall. I love photos! They make me happy, and this blank wall is right outside of our master so I see them every time I leave our master.

I got Chad to cut some cute designs out of plywood and had some pictures printed. I painted them in different colors.


Here's what it looked like when I finished. 


They have been up for about a year. The colors are driving me CRAZY! It's too much! I want to paint them white.  I wanted to keep the photos so I did some brainstorming.

Here's what I did....

I took all the frames upstairs to the craft room and laid them on the table. I thought about putting blue painter's tape over the pictures but that would have taken forever. 


I decided to take a chance and free hand it! I used the "newest", cleanest brush I had. I used valspar white paint (I figured it was thicker than acrylic paint from walmart). I went very slow and tried my hardest not to get paint on the photo.


First coat covered it pretty well. You could still see lines in the paint so it defiantly needed two coats. 


Clearly I wasn't perfect in drawing the straight line with white paint. But luckily the paint just wiped off!! Used my fingers and wiped it off as soon as I saw it. If I waited, it would dry! 


It's still not perfect, but hanging on the wall, you can barely notice!


My hands look like this every time I paint! ha.


I love the way it turned out. You notice the photo instead of the loud color of the frame!


Before & After (maybe you saw this on instagram)


After!! Reeves was being Vanna! I think I'm going to paint the bench white too. We'll see.


What do you think? Do you like the white better? What color should I paint the bench?